To remove a garbage disposal knockout plug, lay the unit on its side and use a screwdriver and hammer to tap it out. Ensure the unit is off and unplugged before starting.
Garbage disposal units are designed to make kitchen clean-up a breeze, yet they often come with a minor, but crucial, installation step: removing the knockout plug for dishwasher drain hook-up. This plug, if not removed, will prevent water from draining into the disposal from the dishwasher.
The removal process is straightforward, requiring minimal tools and time. Homeowners and DIY enthusiasts alike can undertake this task with ease, as it does not require specialized skills. By ensuring the appliance is disconnected from power, you can perform this step safely, making your disposal ready for seamless integration with your dishwasher.
Credit: www.callchampionservices.com
Introduction To Garbage Disposal Knockout Plugs
Garbage disposal knockout plugs are essential, yet often overlooked. These small items play a significant role in the functionality of a garbage disposal unit, especially for those integrating a dishwasher into the system. Understanding the knockout plug is crucial for a smooth installation or replacement process. Let’s dive into what a knockout plug is and its purpose in your garbage disposal system.
What Is A Knockout Plug?
Simply put, a knockout plug is a small, circular piece found on new garbage disposal units. This plug seals off the port that connects the disposal to a dishwasher. It is called a ‘knockout’ plug because you must remove it if you plan to attach a dishwasher drain hose to your disposal. This ensures the dishwasher’s waste water can flow directly into the disposal for efficient operation.
The Role Of A Knockout Plug In Garbage Disposals
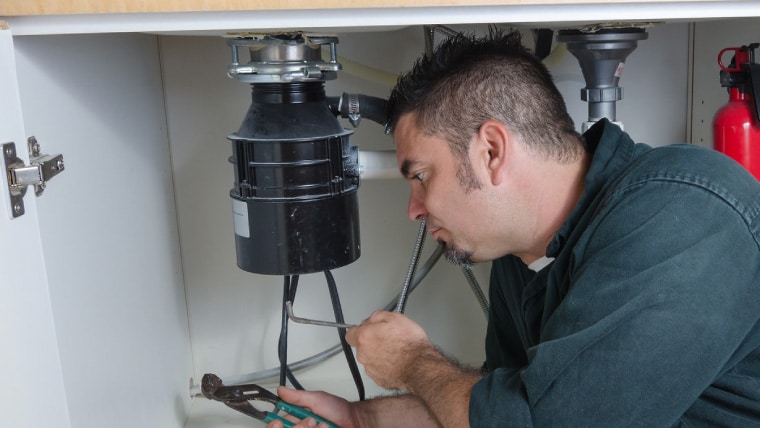
The knockout plug serves an important safety purpose. It prevents water and debris from leaving the disposal when there is no dishwasher connected. Keeping the plug in place avoids potential leaks and blockages in your kitchen’s plumbing system. Removal of the plug is a straightforward process but requires careful action to avoid damage to the disposal unit and ensure the dishwasher waste water gets directed correctly.
Safety First: Preparing To Work On Your Garbage Disposal
Working on a garbage disposal requires caution and preparation. Whether you’re a DIY enthusiast or a first-timer, safety is paramount. Before you remove the knockout plug, you must prepare your workspace. This ensures your safety and the smooth completion of the task. Let’s get started with the safety protocols we must follow.
Disconnecting Power
The first step is to prevent any electrical accidents. Always disconnect power to your garbage disposal before you begin. Here’s how:
- Find your disposal’s power cord.
- Unplug it from the electrical outlet.
- Confirm there is no power by trying to turn on the disposal.
For extra safety, turn off the breaker controlling the disposal circuit. Use a non-contact voltage tester to ensure the power is off.
Gathering Necessary Tools And Materials
Proper tools make the job easier. Gather what you need before you start. Here is a list of tools and materials:
| Tool/Material | Use |
|---|---|
| Flat-head Screwdriver | To pry out the knockout plug |
| Hammer | To help in removing the plug |
| Flashlight | For better visibility |
| Gloves | For hand protection |
| Goggles | For eye protection |
Gather everything within reach before you begin. This avoids unnecessary interruptions.
Step-by-step Guide To Removing The Knockout Plug
Ready to power up your dishwasher with your garbage disposal? First, you need to remove the knockout plug. This guide walks you through the process. It’s a simple task. Let’s get your kitchen running smoothly.
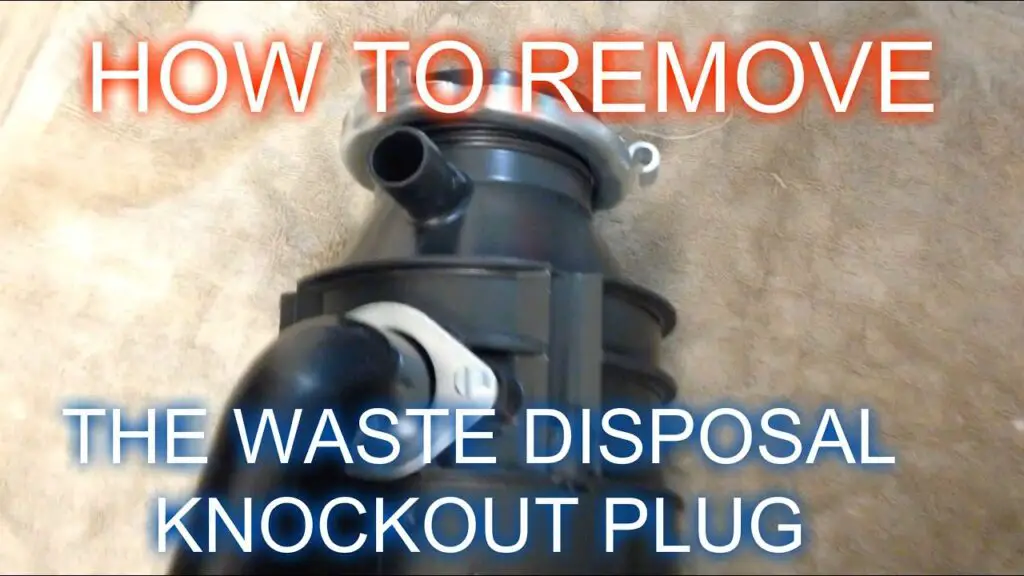
Locating The Plug
The knockout plug is a small, circular piece. It’s on the disposal’s side. Look for a tube connector. This is where the dishwasher hose fits. The plug is inside this nozzle. Make sure power is off before you start. Safety comes first.
Tools And Techniques For Removal
You’ll need a few basic tools for this job. A hammer and a screwdriver or a punch will do the trick. Here’s what to do:
- Position the screwdriver or punch at the plug’s edge. Center it carefully.
- With a hammer, tap firmly but gently. The plug will dislodge inside. Tap evenly around the edges if needed.
- Once loose, reach inside the disposal. Remove the plug. Be cautious of sharp edges.
That’s it! Your disposal is now ready for dishwasher connection. Follow these steps, and enjoy a seamless kitchen setup.

Credit: plumbinsight.com
Troubleshooting Common Issues
Removing the knockout plug from a garbage disposal can sometimes present challenges. This section delves into common problems encountered during the process. Clear solutions help make the task smooth and stress-free.When the Plug Won’t Budge
When The Plug Won’t Budge
Stuck plugs can be a nuisance. Before proceeding, ensure the power is off. Employ a screwdriver and hammer with care. Position the screwdriver on the plug’s perimeter. Gently tap with a hammer. Rotate the screwdriver around the plug’s edge. Apply patient, even pressure. Oftentimes, this technique loosens the stubborn plug.Dealing with Plastic Shards and Debris
Dealing With Plastic Shards And Debris
After removing the knockout plug, plastic shards may remain. Wear safety gloves to protect hands. Use needle-nose pliers for the removal of large pieces. A vacuum cleaner with a hose attachment helps clear smaller debris. Ensure the interior of the garbage disposal is debris-free to prevent future problems.
Post-removal Steps: Ensuring Proper Functionality
After you’ve successfully removed the knockout plug from your garbage disposal, it’s crucial to check that everything works correctly. These post-removal steps help prevent future problems. Follow the steps to ensure your garbage disposal runs smoothly.
Inspecting For Leaks And Connections
Always make sure there are no leaks. Water can damage your kitchen. It can also lead to mold. Here’s how to ensure your garbage disposal is leak-free:
- Place a bucket under the disposal.
- Fill the sink with water.
- Look for dripping water beneath the sink.
- Tighten any loose connections.
Check all connections around the garbage disposal. Make sure they are tight. These include the drain pipe and dishwasher hose. Firm connections keep your kitchen safe from water damage.
Testing The Garbage Disposal
Now, test your garbage disposal. This ensures it’s ready for use. Follow these steps:
- Turn the power back on at the circuit breaker.
- Run water from the faucet into the disposal.
- Turn on the disposal and listen. It should sound normal.
- Check if the disposal grinds waste without issues.
If the disposal vibrates more than usual, switch it off. Make sure nothing blocks the blades. Once it runs smoothly, your garbage disposal is all set!
Final Thoughts And Maintenance Tips
Knowing how to remove a garbage disposal knockout plug is a solid step in DIY home maintenance. Yet, caring for the unit once it’s up and running matters just as much. Let’s delve into making sure your disposal continues to operate smoothly long after the plug is gone.
Proper Disposal Care To Avoid Future Issues
Using your garbage disposal correctly can prevent jams and breakdowns. Keep these pointers in mind:
- Run cold water while and after disposing food waste.
- Avoid hard or fibrous materials like bones or celery that can cause clogs.
- Regularly use a disposal cleaner for freshness and to prevent buildup.
- For an easy clean, throw in some ice cubes and coarse salt now and then.
When To Call A Professional
Even with utmost care, your disposal might need expert attention.
| Call a pro if: | Why? |
|---|---|
| Strange noises persist | Could signal internal issues. |
| There’s a stubborn clog | Forces beyond DIY measures. |
| Water leaks appear | Possible seal or gasket failure. |
If any of these conditions apply, it’s time to enlist a professional. They’ll bring the right tools and know-how to safeguard your home and disposal’s well-being.

Credit: www.youtube.com
FAQs On How To Remove Garbage Disposal Knockout Plug
How Do You Remove A Disposal Knockout Plug?
To remove a garbage disposal knockout plug, first, ensure the unit is off. Place a screwdriver against the plug and tap it with a hammer until it pops inside. Retrieve the plug from the disposal unit.
Where Is The Knockout Drain On A Dishwasher?
The knockout drain on a dishwasher is typically located on the dishwasher’s garbage disposal connector. It’s a small, round plastic plug you remove to attach the drain hose.
Does A New Garbage Disposal Have A Plug In The Dishwasher Drain?
New garbage disposals typically include a knockout plug for dishwasher drain connections. Remove this plug before attaching the dishwasher drain hose.
Do All Garbage Disposals Have A Plug?
Not all garbage disposals come with a plug; some are direct-wired into the home’s electrical system. Always check the disposal’s installation requirements.
Conclusion
Tackling garbage disposal woes just got easier. With the right tools and this step-by-step guide, you’re equipped to safely remove the knockout plug. Enjoy the newfound knowledge for a smooth DIY plumbing experience. Remember, safety first and when in doubt, seek expert help.
Ready for the next household fix? Stay tuned for more tips.